Getting Drops Into a Cavalier’s Ear Canal
Anyone who has a Cavalier King Charles Spaniel knows that their adorable, long, floppy ears are a hallmark of the breed, but they can also be a magnet for trouble. Getting those crucial ear drops into a squirming, unhappy Cavalier’s ear canal can feel like an Olympic sport, leaving both you and your furry friend stressed and potentially even a little damp. This guide is here to walk you through every step, from understanding why it's so challenging to techniques that make the process smoother and less traumatic for everyone involved.
Why Cavalier Ear Drops Can Feel Like a Battle
It’s easy to feel like you’re doing something wrong when your sweet Cavalier suddenly turns into a wriggly, head-shaking blur at the mere sight of an ear drop bottle. But trust me, you're not alone in this struggle. There are very real, understandable reasons why ear care, particularly administering drops, can be such a contentious issue with our beloved Cavaliers. It's not just them being stubborn; there's often discomfort, fear, and even anatomical factors at play.
The Anatomy That Makes Ear Care Tricky
Unlike breeds with upright ears, Cavaliers, with their signature long, heavily feathered drop ears, have an ear canal that is a perfect breeding ground for moisture and warmth. The ear flap itself acts like a lid, trapping air and humidity inside, which is exactly what yeast and bacteria love. This unique structure means they are predisposed to ear infections, and getting medication deep into that often inflamed, winding canal isn't straightforward. You might find yourself grappling with a strong, unpleasant odor from the ear, which is a tell-tale sign of an active infection. Understanding why a Cavalier's drop ears trap infection is crucial to effective prevention and treatment.
Imagine trying to reach into a dark, L-shaped tunnel that is sensitive and possibly painful. That's essentially what we're asking our Cavaliers to tolerate. Their ear canals are much longer and have a distinct bend compared to a human’s, making it difficult to visualize the target area and ensure the drops are reaching where they need to go, not just pooling at the entrance. This anatomical challenge means precision and patience are paramount. Without proper technique, drops might not penetrate deep enough, leading to ineffective treatment and prolonged discomfort for your dog, further exacerbating their reluctance.
Beyond the physical structure, a Cavalier's sensitive nature can also play a role. They are incredibly attuned to our emotions, and if we approach them with trepidation or frustration, they pick up on that immediately. What starts as a minor discomfort from the ear infection itself can quickly escalate into a full-blown fear of the ear drop bottle and the entire process. This learned aversion makes subsequent applications even harder, turning what should be a routine health task into a stressful ordeal for both owner and pet.
Common Reasons for Cavalier Ear Infections
Cavalier King Charles Spaniels are particularly prone to ear infections, which makes learning how to administer drops an unfortunately common skill for owners. One of the most frequent culprits behind these recurring issues is allergies. Just like people can get seasonal allergies, Cavaliers can develop environmental allergies (to pollen, dust mites, mold) or food allergies that manifest as skin irritation, often severely affecting the ears. When their ears become inflamed due to an allergic reaction, the natural defenses are weakened, making them susceptible to secondary infections by yeast (like Malassezia) or bacteria (like Staphylococcus or Pseudomonas).
Another significant factor is simply the design of their ears. As mentioned, the heavy, pendulous ear flaps restrict airflow, creating a warm, moist environment ideal for pathogen growth. This is compounded by the amount of hair growing inside the ear canal in some Cavaliers. While breeders and groomers often debate whether to pluck this hair, sometimes it can trap debris and moisture, contributing to problems. Regular cleaning is a must, but even with diligent care, some Cavaliers are just predisposed. This is why you should always be vigilant for the smell that means a Cavalier ear infection.
Furthermore, swimming or baths where water gets into the ears without thorough drying can also trigger infections. The retained moisture provides the perfect damp habitat for bacteria and yeast to multiply. Even everyday dirt, debris, or foreign objects like grass seeds can find their way into the canal and cause irritation, leading to infection. Because ear infections are so common in this breed, it's vital to address them promptly and understand that recurrent ear infections in a Cavalier may point to an underlying issue that needs veterinary investigation beyond just drops.
Essential Preparation Before Administering Ear Drops
Approaching your Cavalier with a bottle of ear drops, unprepared, is a recipe for disaster. Think of it like trying to get a toddler to take medicine without a plan – it rarely ends well! Successful ear drop application starts long before the bottle even comes out. It’s all about creating a calm environment, gathering the right tools, and setting your Cavalier up for success with positive associations. This proactive approach minimizes stress for everyone and makes the actual task much more manageable.
Gathering Your Supplies and Setting the Scene
Before you even think about touching your Cavalier’s ear, gather everything you’ll need and place it within easy reach. This prevents you from fumbling or having to get up mid-process, which can cause your dog to become anxious or escape. You’ll need the prescribed ear drops, cotton balls or gauze pads (never cotton swabs for inside the canal, as they can push debris further in or damage the eardrum), and plenty of high-value, delicious treats. For a Cavalier that works better for toys or food, ensure you have their absolute favorite on hand. Having a towel nearby is also a good idea to wipe up any excess medication or accidental spills.
Choose a quiet, comfortable space where your Cavalier feels safe and there are minimal distractions. This might be a favorite rug, their bed, or even your lap if they enjoy being held. Avoid highly stimulating areas like a busy doorway or where other pets are playing. If your Cavalier tends to be a bit of a Velcro dog and follows you room to room, use this to your advantage by choosing a spot where they naturally feel secure by your side. A good rule of thumb is to approach the situation with calm energy yourself, as your dog will mirror your demeanor.
Finally, ensure the ear drops are at room temperature. Cold drops can be a shocking and uncomfortable sensation when they hit a sensitive, inflamed ear canal, making your Cavalier even more reluctant. You can gently warm the bottle in your hand or in a bowl of warm water for a few minutes before use, making sure it’s not too hot. This small step can make a significant difference in how your dog perceives the application. Remember, positive experiences, no matter how small, build trust and cooperation over time.
Getting Your Cavalier Comfortable with the Process
The key to successful ear care with a Cavalier is desensitization and positive reinforcement, long before an infection strikes. If your Cavalier only associates ear handling with pain or discomfort, they will naturally resist. Start by simply touching their ears gently during cuddle sessions or when they’re relaxed. Lift their ear flap, gently rub the base of their ear, and immediately reward them with a treat and praise. Repeat this many times a day, gradually increasing the duration and intensity of the touch, working your way up to mimicking the ear drop application motion with your fingers.
It's also beneficial to incorporate ear checks into your daily routine. This means simply lifting the ear flap, looking inside, and perhaps giving a quick, gentle massage at the base, followed by a reward. This helps them understand that ear handling isn't always followed by something unpleasant. If you notice any redness, discharge, or the distinct, often yeasty smell of infection, it's a cue that it's time for a vet visit, and that preventative ear cleaning supplies as a standing cost are a worthwhile investment. Early detection can mean less severe infections and easier treatment.
Consider incorporating a special "ear time" treat or toy that only appears when you're doing ear-related activities. This creates a strong positive association. For instance, you could give them a long-lasting chew or a LickiMat smeared with peanut butter to distract them while you gently handle their ears. This focused distraction can make a huge difference, especially if your Cavalier finds the process particularly stressful. It shifts their focus from the potential discomfort to a highly rewarding experience, which is crucial for building their tolerance and trust.
A Step-by-Step Guide to Applying Ear Drops Effectively
Now that you've prepared yourself and your Cavalier, it's time for the main event. Remember, confidence and a gentle but firm approach are your best allies. Rushing or showing hesitation will only make your Cavalier more anxious. Take a deep breath, stay calm, and follow these steps to ensure the drops are administered correctly and effectively, minimizing stress for both of you.
Positioning Your Cavalier for Success
The way you hold and position your Cavalier is paramount to both your success and their safety. For most Cavaliers, placing them in your lap or on a comfortable, elevated surface like a couch or table (if they're used to it) works well. The goal is to minimize their ability to wriggle away or shake their head forcefully during application. If you have a second person available, this can be incredibly helpful. One person can gently hold the dog, perhaps offering continuous treats or praise, while the other administers the drops.
If you’re on your own, try kneeling on the floor with your Cavalier between your legs, gently cradling their head. This position can restrict their backward movement. Alternatively, a technique that many owners find useful is to sit on the floor with your dog in front of you, facing away, and gently bring their body close to yours. Then, use your non-dominant arm to stabilize their head, gently tilting it slightly. The key is a secure but gentle hold that doesn't cause further distress. For a highly resistant Cavalier, you might need to try a towel wrap, like a puppy burrito, to keep them from wriggling, ensuring their head remains accessible.
It's also important to consider the height. If you're bending over too far, it puts strain on your back and makes you less steady. Find a position where you can comfortably see into the ear canal and have a clear shot with the dropper. Always use a soft, reassuring voice, even if they're resisting. Your calm tone can sometimes cut through their anxiety and remind them that you're there to help, not to hurt. Remember, a quick, efficient application is better than a prolonged struggle that leaves everyone exhausted.
The Proper Technique for Drop Delivery
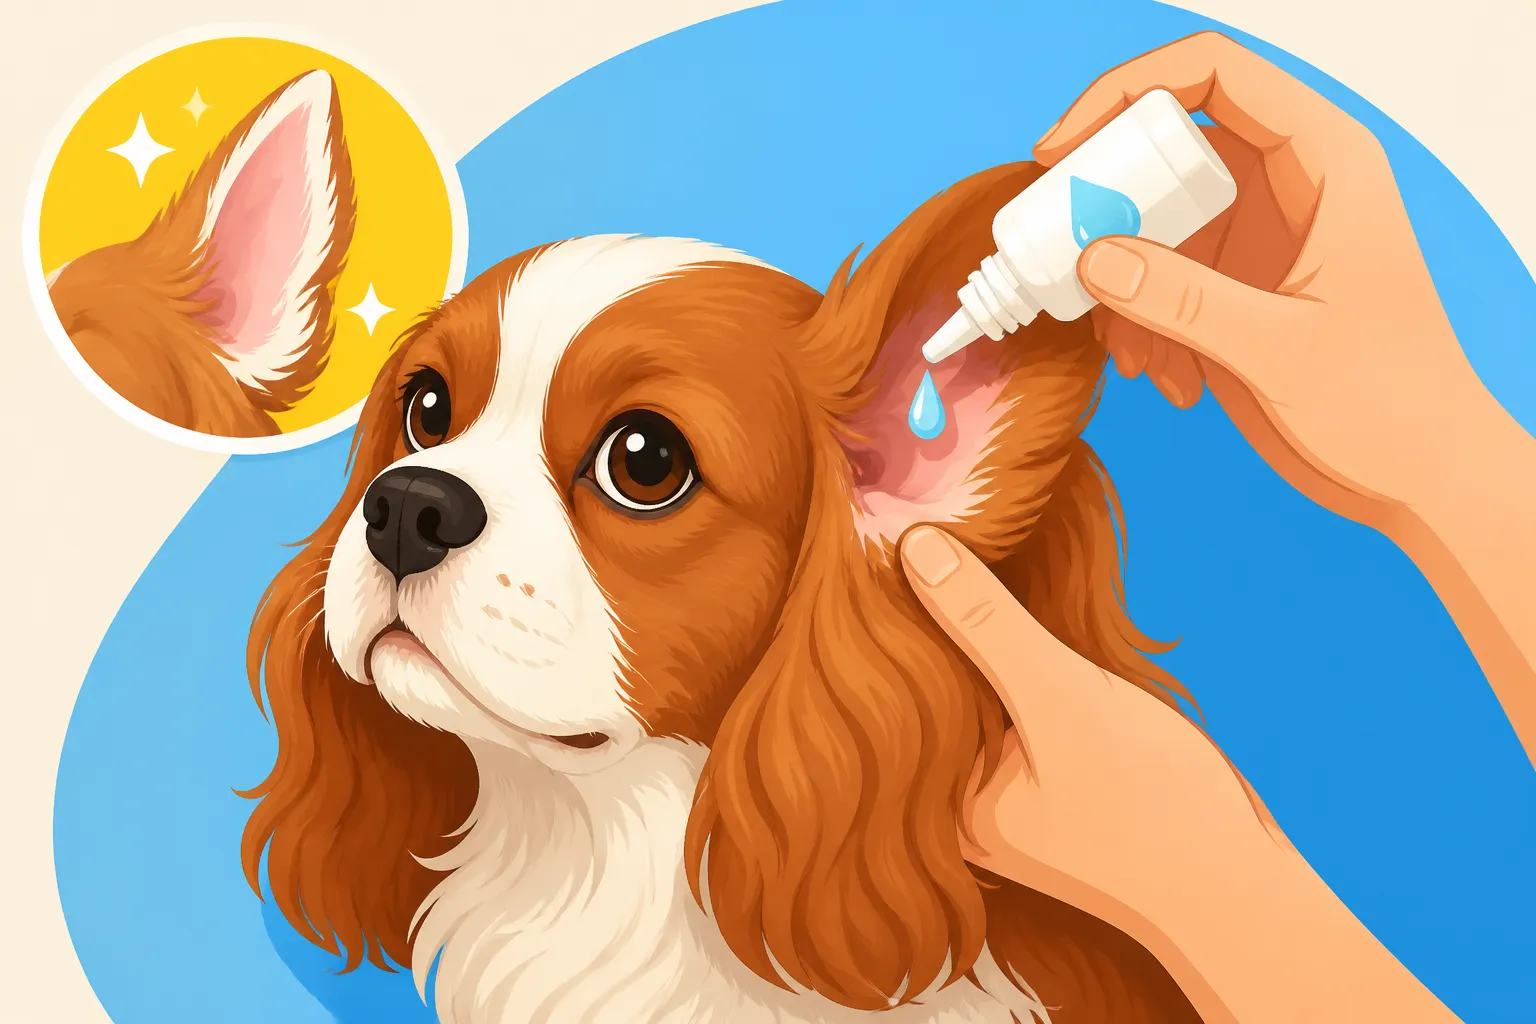
Once your Cavalier is securely positioned, it's time to administer the drops. Start by gently lifting the ear flap with one hand, exposing the ear canal opening. Take a moment to inspect the ear. If there's a lot of visible discharge or debris, you might need to clean the outer ear gently with a vet-approved ear cleaner and a cotton ball before applying the drops, especially if your vet has prescribed it. Cleaning a Cavalier's ear the right way can significantly improve the efficacy of the drops by removing barriers.
Hold the ear drop bottle with your dominant hand, being careful not to touch the dropper tip to any part of your dog's ear. This prevents contamination of the medication. Position the dropper tip just above the ear canal opening, and squeeze the prescribed number of drops into the ear. Don't plunge the dropper deep into the ear; just let the drops fall in. You might hear a "squish" sound, which is normal. Immediately after the drops are in, keep hold of the ear flap and gently massage the base of the ear for about 20-30 seconds. This helps distribute the medication down into the ear canal. You should hear a squelching sound as the liquid moves around.
After massaging, let go of the ear. Your Cavalier will likely want to shake their head vigorously – let them! This natural action helps further distribute the medication and expels any excess. Be prepared to step back and avoid being splattered. Immediately offer a high-value treat and enthusiastic praise. This immediate positive reinforcement helps to counter the unpleasant sensation of the drops and the head shake. The faster you can transition from the drops to the reward, the better the association for your dog. Consistency in this technique is vital for treatment success.
Post-Application Care and Rewards
The moment the drops are in and the head shake is over, the real work of positive reinforcement begins. Immediately reward your Cavalier with their absolute favorite treat. We're talking something irresistible – a tiny piece of cooked chicken, cheese, or a high-value training treat. Pair this with enthusiastic verbal praise, like "Good boy/girl! Such a brave pup!" The goal is to make the entire experience, from beginning to end, culminate in something wonderful. This helps to override the memory of the drops themselves.
It’s also helpful to engage them in a short, fun activity immediately after. A quick game of fetch with their favorite toy, a few minutes of gentle belly rubs, or even just a cuddle session on the couch can distract them and further solidify the positive association. You want them to think, "Ugh, ear drops… but then that amazing treat and playtime! Maybe it's not so bad after all." Over time, this consistent positive reinforcement can significantly reduce their anxiety around ear care.
Remember to keep the area around their ear clean. Any excess medication that drips out can make the surrounding fur sticky or attract dirt. Gently wipe the outer ear and the inside of the ear flap with a clean tissue or soft cloth. Avoid rubbing harshly, especially if the skin is inflamed. A regular check of their ears as part of their daily grooming routine will also help you stay on top of any potential issues. This includes checking for redness, swelling, or any unusual discharge. Consistent care, coupled with generous rewards, transforms a daunting task into a manageable part of your Cavalier's health routine.
Troubleshooting Common Challenges and Frustrations
Even with the best preparation and technique, there will be days when getting those drops in feels impossible. Cavaliers, despite their sweet nature, can be surprisingly stubborn when they don't want to do something, especially if it's uncomfortable. Don't get discouraged! Many owners face similar frustrations. The key is to adapt your approach, maintain your patience, and understand that sometimes, a different strategy is needed.
Dealing with a Resistant or Fearful Cavalier
If your Cavalier becomes highly resistant, pulling away, shaking their head violently, or even trying to snap, it’s a clear sign that they are either in pain or genuinely fearful. First, rule out increased pain – has the infection worsened? Does it seem more sensitive than before? If so, a call to your vet might be in order. They may need additional pain medication or a different treatment approach. For pure fear, you’ll need to re-evaluate your desensitization strategy.
In situations where your Cavalier is outright refusing, do not force the issue to the point of injuring them or yourself. Sometimes, a short break to regroup and allow everyone to calm down is the best approach. Try again after a few minutes, perhaps with a different technique or in a new location. If you have a partner or family member, ask for their help. A second set of hands can make a huge difference in gently restraining your dog while you apply the drops. One person can hold the head securely while the other provides continuous treats, making them a "treat dispenser."
For chronically fearful Cavaliers, you might need to consult with your veterinarian about mild sedatives or anti-anxiety medications to help make the process less stressful during the initial phase of treatment. These are short-term solutions to help you get the necessary medication in, while you continue to work on long-term positive reinforcement and desensitization. Never underestimate the power of a positive association; even if it means working very slowly, it's worth it for your Cavalier's long-term comfort and your peace of mind. It’s also wise to consider pet insurance, like a plan from Healthy Paws, early on, as anxiety issues and recurring ear infections can lead to ongoing vet costs.
When Drops Don't Seem to Be Working
It can be incredibly disheartening when you're diligently applying ear drops, but your Cavalier's ear infection just doesn't seem to be improving, or even appears to be getting worse. There are several reasons this might be happening, and it's important not to just keep pushing forward without investigation. The first and most common issue is improper application – are the drops actually making it into the ear canal and being massaged down, or are they mostly sitting at the entrance or getting shaken out immediately? Revisit your technique and ensure you're getting the medication deep enough.
Another common reason for treatment failure is that the initial diagnosis might have been incomplete, or the infection has developed resistance. If the infection is bacterial, but the drops are only effective against yeast (or vice versa), it won't clear up. Furthermore, if the wrong type of bacteria is present, the antibiotic in the drops might not be effective. In these cases, your vet may need to perform a re-check, possibly taking another swab of the ear to culture the bacteria and determine which antibiotic will actually work. This ensures your Cavalier gets the most targeted and effective medication.
Sometimes, an underlying condition is preventing the ear from healing. This could be severe allergies that are causing chronic inflammation, deep-seated infections that have gone into the middle ear, or even a foreign body lodged deep inside. In rare cases, a growth or tumor could be blocking the canal. If your Cavalier's ear isn't responding after a week of diligent treatment, it’s absolutely crucial to go back to the vet. They might suggest further diagnostics, like an otoscopic examination under sedation, or recommend a different course of action, which could involve oral medications in addition to or instead of drops. A comprehensive pet insurance policy, such as those offered by Healthy Paws, can be incredibly helpful for managing these unexpected diagnostic and treatment costs associated with chronic ear issues.
Preventing Future Ear Issues and Maintaining Health
The best offense is a good defense, especially when it comes to Cavalier ear health. While some predisposition to ear problems is inherent in the breed, a proactive approach to care can significantly reduce the frequency and severity of infections. Establishing a consistent routine and knowing what to look for can save you (and your Cavalier) a lot of discomfort, vet visits, and the struggle of administering drops.
Establishing a Regular Ear Cleaning Routine
One of the most effective ways to prevent ear infections in your Cavalier is to establish a regular ear cleaning schedule. How often depends on your individual dog – some need it weekly, others every few weeks. A good starting point is once a week or every two weeks, especially after baths or swimming, to ensure their ears are kept dry. Always use a vet-approved ear cleaner, specifically designed for dogs. These cleaners help break down wax and debris without irritating the sensitive ear canal. Remember, ear cleaner worth using on a Cavalier will be gentle yet effective.
When cleaning, gently lift the ear flap and squirt a generous amount of cleaner into the ear canal until it's full. Then, firmly but gently massage the base of the ear for 20-30 seconds. You should hear that satisfying squelching sound, indicating the cleaner is working its way down. Let your Cavalier shake their head, then use a cotton ball or soft tissue to wipe away any discharge and excess cleaner from the visible parts of the ear. Never insert anything into the ear canal itself. For more detailed instructions, refer to the guide on cleaning a Cavalier's ear the right way.
This routine not only keeps the ears clean but also helps your Cavalier become accustomed to having their ears handled, making future medication application much easier. Make it a positive experience with treats and praise, just like with drop application. Consistent drying of your Cavalier's ears after a bath or swim is also non-negotiable. Excess moisture is a primary culprit for bacterial and yeast growth, so use a soft towel to thoroughly dry the visible parts of the ear and the underside of the ear flap.
Recognizing Early Signs of Trouble
Being vigilant and recognizing the early signs of an impending ear infection can mean the difference between a minor issue treated at home with simple drops and a full-blown, painful infection requiring more intensive veterinary intervention. Cavaliers, being the stoic little creatures they often are, might not always make it obvious that they're in discomfort, so it's up to us to be observant.
One of the first signs you might notice is your Cavalier shaking their head more frequently than usual or scratching excessively at their ears. They might rub their ears along furniture or the floor. If you lift their ear flap, you might see redness, swelling, or an increase in discharge – it could be dark and waxy, or yellowish and pus-like. A distinct, often pungent odor emanating from the ear is a very strong indicator of an infection, usually yeast or bacterial. Don't ignore these subtle changes; early intervention is key.
If you observe any of these symptoms, it's time for a vet visit. Self-diagnosing and using old ear drops or human medications is strongly discouraged, as different types of infections require different treatments. Your vet will examine the ear with an otoscope, potentially take a swab for cytology to identify the specific pathogen (yeast, bacteria, or mites), and prescribe the appropriate medication. Addressing these issues promptly can prevent them from escalating into chronic ear disease and Cavalier hearing loss, which can be much harder and more expensive to treat down the line. Regular Daily Ear Checks on a Cavalier can help you catch these signs quickly.
Ear Care Regimen for Cavaliers: A Comparison
To help summarize the different aspects of Cavalier ear care, here's a quick comparison of the routine maintenance versus managing an active infection.
| Aspect | Routine Preventive Care | Managing an Active Infection |
|---|---|---|
| Frequency | Weekly to bi-weekly, or after swimming/baths | As prescribed by vet (e.g., twice daily for 7-14 days) |
| Goal | Prevent infection, remove wax/debris, maintain ear health, desensitize | Treat existing infection, reduce pain/inflammation, eliminate pathogens |
| Products Used | Vet-approved ear cleaner, cotton balls, treats | Prescribed ear drops (antibiotic, antifungal, anti-inflammatory), cotton balls, treats |
| Application | Squirt cleaner, massage base of ear, wipe outer ear | Apply prescribed drops, massage base of ear gently, wipe excess |
| Key Considerations | Consistent schedule, positive reinforcement, thorough drying | Exact dosage/schedule, don't stop early, follow-up vet visit |
| Challenges | Mild resistance, finding time | Significant resistance, pain response, ensuring correct application |
| Vet Involvement | Annual check-ups, consult if persistent irritation or smell | Immediate visit for diagnosis, follow-up to confirm healing, re-culture if not resolving |
Disclaimer
This article is intended for informational purposes only and does not constitute medical advice. Always consult with a qualified veterinarian for any health concerns or before making any decisions about your Cavalier King Charles Spaniel's health or treatment plan.