Why Cotton Swabs Ruin a Cavalier’s Ear
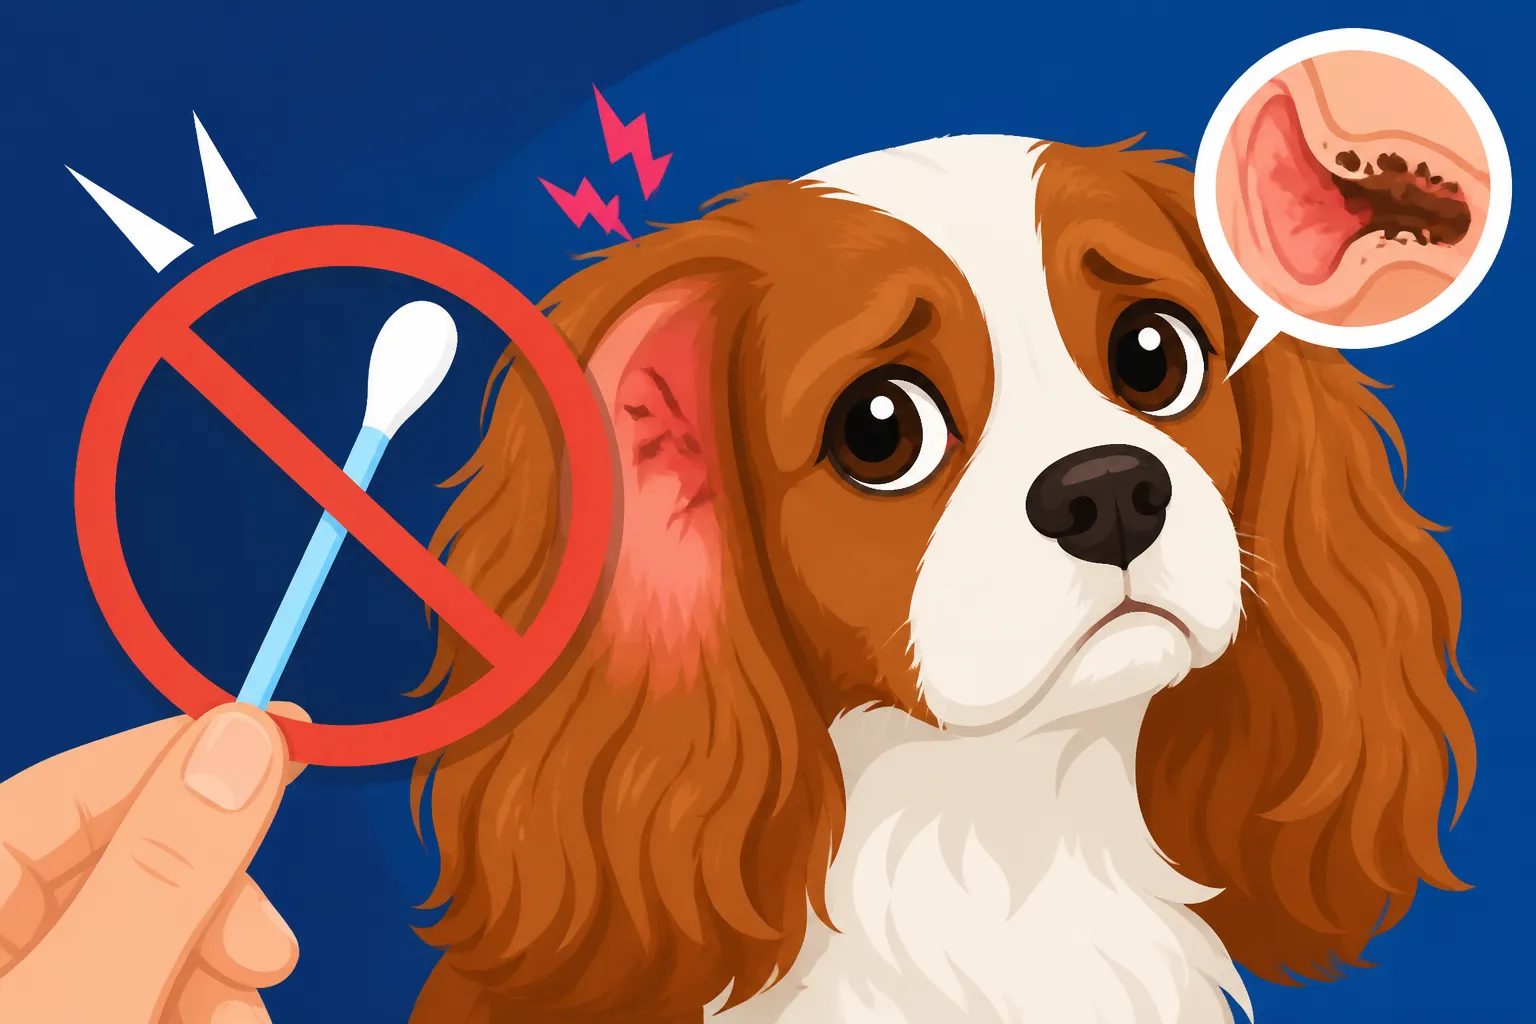
It's an incredibly common mistake, one made with the best intentions: reaching for a cotton swab to clean out your beloved Cavalier's ears. You see a bit of gunk, maybe some visible wax, and naturally, you want to help keep them clean and healthy. Unfortunately, what feels like a helpful gesture can actually do far more harm than good, potentially pushing debris deeper and irritating delicate ear canals. This guide will delve into why cotton swabs are detrimental for your Cavalier's ears and, more importantly, how to properly care for those adorable, floppy ears to prevent common issues.
The Allure of the Cotton Swab: Why We Reach for Them
Let's be honest, those little cotton-tipped sticks are practically synonymous with ear cleaning for many of us. We use them ourselves, and they seem so convenient for getting into those small spaces. It’s no wonder so many Cavalier owners instinctively reach for them when they spot some grime in their dog’s ear. It feels like an intuitive, simple solution, a quick fix for visible dirt or wax.
A Misguided Sense of Control
When you look into your Cavalier's ear, especially with their long, often furry ear leather, you might see some dark wax or debris accumulating. It can look a bit unsightly, and your immediate instinct is often to clean it up. A cotton swab seems like the perfect tool for this precise job. It’s small, it looks gentle, and it offers that satisfying feeling of having "cleaned" something. Many owners feel a sense of accomplishment, believing they've removed the visible dirt and prevented future problems. However, this visual satisfaction can be deceptive, as the real problem often lies deeper, out of sight.
The Human Ear Cleaning Parallel
For us humans, cotton swabs are a standard bathroom item for ear care. We're taught, or at least we observe, that they're used to clean the outer ear and sometimes a little bit into the canal. This creates a strong mental association: cotton swabs equal ear cleaning. It's a natural leap to apply this same logic to our pets, especially when their ear canals seem accessible from the outside. We assume that if it works for us, it must work for them, not realizing that canine ear anatomy is fundamentally different from our own, making this practice not only ineffective but potentially quite dangerous for our furry friends.
What Happens When a Cotton Swab Enters a Cavalier's Ear Canal?
While your intentions are good, inserting a cotton swab into your Cavalier's ear canal is a bit like trying to sweep dust under a rug with a broom that's too big. You might clear a little off the top, but most of it just gets pushed further in, creating a bigger mess where you can't see it. The delicate structures inside a dog's ear are simply not designed for such intrusion.
Pushing Debris Deeper
One of the most significant dangers of using cotton swabs in your Cavalier’s ear is that you almost invariably push wax, dirt, and other debris deeper into the ear canal. Think of your Cavalier's ear as having a long, L-shaped corridor rather than a straight tunnel like a human ear. When you try to "clean" with a swab, you're usually just compacting whatever is visible further down this L-bend, making it impossible for the ear's natural self-cleaning mechanisms to work effectively. This pushed-in debris then becomes trapped, forming a plug against the eardrum or deeper parts of the canal. This trapped material can lead to increased moisture, creating an ideal breeding ground for bacteria and yeast, which are the primary culprits behind painful ear infections. It’s a frustrating cycle: you try to clean, inadvertently cause a blockage, and then an infection brews.
Causing Micro-Trauma and Inflammation
The skin lining a dog's ear canal is incredibly delicate and sensitive, much thinner than the skin on the outside of their body. Even a gentle swipe with a cotton swab can cause tiny abrasions or micro-traumas to this fragile lining. These minuscule scratches might not be immediately visible, but they break down the skin's natural protective barrier. Once this barrier is compromised, the ear becomes much more susceptible to inflammation and infection. Bacteria and yeast, which are naturally present in small numbers, can then easily invade these tiny wounds and multiply, leading to a full-blown ear infection that causes pain, itching, and discomfort for your Cavalier. Over time, repeated irritation can lead to chronic inflammation, thickening of the ear canal, and even narrowing of the opening, making future infections even harder to treat. This can be particularly problematic for Cavaliers who are already prone to Recurrent Ear Infections in a Cavalier.
The Unique Anatomy of a Cavalier's Ear
Understanding the specific structure of your Cavalier King Charles Spaniel's ear is crucial to appreciating why cotton swabs are a no-go. Their ears are beautiful, a defining characteristic of the breed, but they also come with their own set of challenges when it comes to hygiene.
A Deep, L-Shaped Canal
Unlike the relatively straight ear canal in humans, a dog's ear canal takes a distinctive L-shape. It starts vertically and then makes a sharp, horizontal turn before reaching the eardrum. This deep, winding structure is a marvel of evolutionary design for hearing, but it's a nightmare for manual cleaning tools like cotton swabs. Imagine trying to clean a long, narrow, bent pipe with a short, straight stick – you simply can't reach all the way around the bend, and you're likely to just jam whatever is inside further into the elbow.
This L-shape means that most of the wax and debris naturally produced by the ear glands collects at that horizontal bend. When you insert a cotton swab, you're not pulling anything out; you're just pushing that accumulated gunk around the corner, where it gets packed tight. This packing prevents air circulation, traps moisture, and creates a warm, dark environment perfect for pathogens to thrive. It's why vets universally advise against cotton swabs for internal ear cleaning in dogs – they are simply not designed for this unique anatomy. Knowing What a Healthy Cavalier Ear Looks Like on the inside is important, and a swab can disrupt that health.
Heavy Drop Ears and Poor Airflow
Cavaliers are renowned for their long, silky, heavy drop ears. While undeniably charming, these ears, along with their characteristic feathering, are a major contributing factor to their predisposition to ear problems. The long ear leather effectively seals off the ear canal, greatly restricting airflow. Think of it as putting a lid on a pot: once sealed, the moisture inside has nowhere to go. This creates a consistently warm and humid microclimate within the ear canal.
This warm, moist environment is ideal for the proliferation of yeast and bacteria. Where an upright ear breed might benefit from natural air circulation helping to dry out the ear canal, the Cavalier's ears act like little incubators. This increased humidity softens the skin lining, making it even more vulnerable to the micro-trauma a cotton swab might cause. Combined with the L-shaped canal, these heavy drop ears create a perfect storm for ear infections, making proper external cleaning and proactive care absolutely vital. Why a Cavalier's Drop Ears Trap Infection is a constant battle for owners.
Healthy Cavalier Ear Care: The Right Way to Clean
So, if cotton swabs are out, what's the proper way to keep your Cavalier's ears clean and healthy? The good news is that with the right tools and techniques, it's quite simple and far less invasive than you might imagine. The key is gentle, external cleaning and using products specifically formulated for canine ears.
Gentle External Cleaning
When it comes to your Cavalier's ears, the focus should always be on the outer ear and the very entrance of the ear canal. This means wiping the visible parts of the ear flap (the pinna), the folds of skin just inside the ear opening, and any accessible crevices that collect dirt or wax.
To do this effectively, you'll want to use soft cotton balls, cotton pads, or even a clean, soft cloth. Dampen your chosen cleaning tool with a veterinary-approved ear cleaning solution (more on that in the next section) or even just plain warm water if you're only tackling superficial dirt. Gently wipe away any visible debris, being careful not to push anything into the ear canal. Pay special attention to the underside of the ear flap and around the edges of the ear opening where hair and skin folds can trap moisture and dirt. This external wipe-down is often all that's needed for routine maintenance, especially if your Cavalier doesn't suffer from chronic ear issues. Remember, your goal is to clean what you can see easily, not to probe deep into the canal. Regular Daily Ear Checks on a Cavalier are far more important than aggressive cleaning.
Proper Ear Cleaning Solutions
The right ear cleaning solution is paramount for safe and effective internal cleaning when needed. Forget homemade remedies or harsh chemicals – stick to products specifically designed for dogs and, ideally, recommended by your veterinarian. These solutions are formulated to safely break down wax, dry out the ear canal, and create an environment that's less hospitable for bacteria and yeast, all without irritating the delicate skin.
Many quality ear cleaners contain ingredients like salicylic acid, malic acid, or boric acid, which help to gently exfoliate and acidify the ear canal, or ceramides that help support skin barrier health. Some even include gentle drying agents. You can often find excellent options from trusted pet supply retailers like Chewy or Amazon. To apply, gently lift your Cavalier's ear flap and fill the ear canal with the solution until it almost overflows. Don't be shy; you need enough liquid to really flush the canal. Allow your Cavalier to shake their head, which helps dislodge debris. After they shake, use those soft cotton balls or pads to wipe away any solution and loosened debris from the outside of the ear opening. Never insert the cotton ball or pad into the canal itself. Your vet can show you the correct amount to use and the best technique for Cleaning a Cavalier's Ear the Right Way.
The Role of a Gentle Massage
Once you've squirted the appropriate ear cleaning solution into your Cavalier's ear canal, the next crucial step is a gentle massage. This isn't just a feel-good moment; it's vital for helping the solution work its magic. With the liquid in the ear, hold the ear flap closed and gently massage the base of your Cavalier's ear, just where it meets their head. You should hear a squishy, liquid sound as you massage – this indicates the solution is moving deep within the L-shaped canal, breaking up wax and debris.
Continue massaging for about 20-30 seconds. This action helps the cleaning solution penetrate all the nooks and crannies of the ear canal, loosening any packed-in wax or foreign material. After massaging, release the ear flap and allow your Cavalier to shake their head vigorously. This shaking action will bring much of the dissolved wax and debris to the surface, where you can then gently wipe it away with a cotton ball or tissue from the outer ear. It’s a messy but effective process, and your Cavalier will usually try to shake their head right away anyway. Ensuring you thoroughly dry the outside of the ear after this, particularly the folds and crevices, is key to preventing moisture buildup. This is also why Drying a Cavalier's Ears After a Bath is so important.
Recognizing Trouble: When to See the Vet
Even with the best at-home care, Cavaliers are prone to ear issues due to their breed-specific anatomy. It’s important to know the signs that indicate a problem that needs professional veterinary attention, rather than just routine cleaning. Ignoring these symptoms can lead to more serious, painful, and costly conditions.
Signs of an Ear Infection
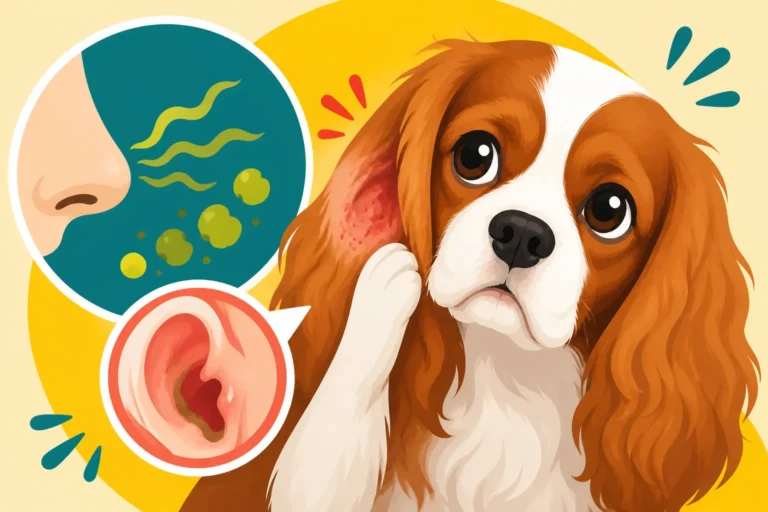
Your Cavalier's ears should generally be clean, odorless, and free of redness or swelling. If you start to notice any deviations from this norm, it's a red flag. Common signs of an ear infection include:
- Persistent head shaking: This is often one of the first and most obvious indicators. Your Cavalier might shake their head much more frequently or aggressively than usual.
- Scratching or pawing at the ears: They might be trying to relieve intense itchiness or pain.
- Redness or swelling: The ear flap itself, or the visible part of the ear canal, may appear inflamed.
- Odor: A foul, yeasty, or unpleasant smell coming from the ear is a strong sign of infection. Many owners describe The Smell That Means a Cavalier Ear Infection as particularly pungent.
- Discharge: You might see brown, black, yellow, or bloody discharge. This can range from waxy to pus-like.
- Pain or sensitivity: Your Cavalier might yelp or pull away when you try to touch their ear or head.
- Crusts or scabs: Around the ear opening, indicating scratching or irritation.
- Changes in behavior: They might become lethargic, withdrawn, or irritable due to discomfort.
If you observe any of these symptoms, even mild ones, it's time for a vet visit. Early intervention is crucial to prevent the infection from worsening or spreading.
Chronic Issues and Underlying Causes
For some Cavaliers, ear infections aren't just an occasional nuisance; they become a chronic problem, recurring despite diligent cleaning. If your Cavalier seems to be constantly battling ear infections, it’s a strong indicator that there's an underlying cause that needs to be identified and addressed. Simply treating the infection won't solve the root problem.
Common underlying causes for chronic ear infections in Cavaliers include:
- Allergies: Environmental allergies (pollen, dust mites, mold) or food allergies are incredibly common culprits. Inflammation from allergies can affect the skin lining the ear canal, making it prone to infection. This is a significant factor in Whether Cavalier Ear Infections Are Allergic.
- Hypothyroidism: An underactive thyroid gland can lead to various skin and coat issues, including recurrent ear infections.
- Foreign bodies: A grass awn, piece of dirt, or other small object can get lodged deep in the ear canal and cause constant irritation and infection.
- Ear mites: While more common in puppies, mites can cause intense itchiness and inflammation.
- Excessive hair in the ear canal: Some Cavaliers have a lot of hair growing inside their ear canals, which can trap wax and moisture. Your vet might recommend plucking or trimming.
- Masses or polyps: Growths within the ear canal can block airflow and promote infection.
Your veterinarian will conduct a thorough examination, which may include using an otoscope to look deep into the ear, taking a swab for cytology (examining under a microscope for yeast or bacteria), and potentially recommending further diagnostics like allergy testing or blood work. Addressing these underlying issues is key to providing your Cavalier with long-term ear health and comfort.
Prevention is Key: Maintaining Long-Term Ear Health
Proactive care is always better than reactive treatment, especially when it comes to those sensitive Cavalier ears. Establishing a consistent routine and being mindful of your Cavalier's overall health can go a long way in preventing those painful and frustrating ear infections.
Regular Checks and Proactive Care
The best defense against ear problems is a good offense, and that means making regular ear checks a part of your routine. Ideally, you should quickly check your Cavalier's ears every day or at least every few days. This doesn't need to be an intensive cleaning session, but rather a quick visual and olfactory inspection. Gently lift their ear flap and take a peek inside. Does it look clean? Is there any redness? Does it smell normal, or is there that tell-tale The Smell That Means a Cavalier Ear Infection?
If you see a little bit of clean, light brown wax in the outer ear, that's perfectly normal. If you notice an increase in wax, or if the wax looks darker, feels greasy, or has an odor, that's your cue to perform a thorough cleaning using a vet-approved ear cleaning solution and the gentle massage technique we discussed. Remember to always dry the ear thoroughly afterward, especially the fluffy feathering around the ear opening. Consider using a soft, absorbent towel or even a low, cool setting on a hairdryer for a few seconds. For Cavaliers who enjoy a good splash, special ear covers or snoods can be useful during meal times or walks in wet weather to keep those long ears out of trouble. Brands like Snoods That Keep Cavalier Ears Out of Dinner are really handy for this!
The Power of Diet and Environment
While often overlooked, your Cavalier's overall health, including their diet and living environment, plays a significant role in their ear health. Just like with humans, a dog's skin health is often a reflection of their internal well-being. A high-quality, balanced diet supports a strong immune system and healthy skin barrier, which can naturally reduce susceptibility to infections. If your Cavalier struggles with recurrent ear infections, discussing dietary changes with your vet might be beneficial. Sometimes, switching to a limited ingredient diet or a novel protein diet, or even a fresh-food option from a brand like Ollie, can make a difference if food allergies are a contributing factor.
Beyond diet, minimizing exposure to environmental allergens can also help. Keeping your home clean and reducing dust, along with regular grooming to remove allergens from their coat, can lessen the inflammatory load on their system. During allergy seasons, consider wiping down your Cavalier's paws and belly after outdoor excursions, as these areas often pick up pollen. Ensuring your Cavalier has a clean, dry sleeping area also helps. Moist environments can encourage fungal growth, so regularly washing bedding and drying it thoroughly is a simple but effective step. Remember, healthy ears are often a sign of a healthy dog, so taking a holistic approach to their care is always the best strategy.
| Action | Cotton Swabs (Internal Use) | Veterinary-Approved Ear Cleaner & Cotton Balls (External/Flush) |
|---|---|---|
| Effect on Debris | Pushes wax/debris deeper, compacting it against eardrum. | Dissolves/loosens wax and debris, allowing it to be flushed out. |
| Risk of Trauma | High risk of micro-abrasions, irritation, and eardrum damage. | Low risk if used correctly, gentle on ear canal lining. |
| Effect on Infection | Can trap moisture, create ideal breeding ground, worsen infection. | Creates an acidic, dry environment, discouraging pathogen growth. |
| Effect on Airflow | Can cause blockages, further restricting airflow. | Improves ear hygiene, promoting better airflow post-cleaning. |
| Reach in L-shaped Canal | Cannot effectively clean the L-shaped canal. | Fills the canal, reaching all surfaces due to liquid nature. |
| Veterinary Recommendation | Strongly discouraged. | Recommended and often prescribed. |
Disclaimer
This article is for general informational purposes only and does not constitute professional advice. Laws, prices and regulations vary by location and change over time. Consult a qualified professional for guidance on your specific situation.